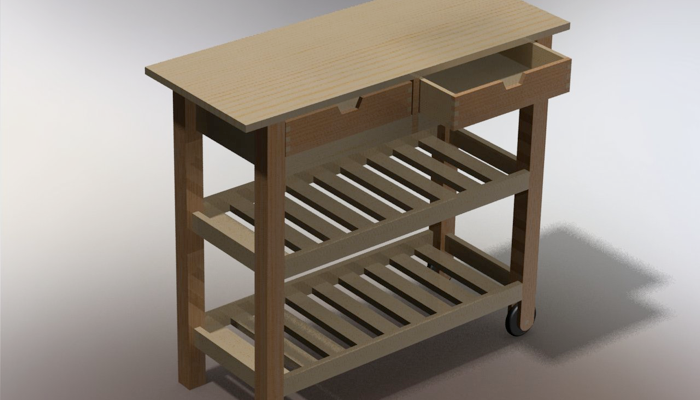
Now you are ready to work on your own……really. In this camp you will be using the skills you have learned so far to create complete working drawings (including a set of assembly instructions with BOMs and dimensioned parts drawings) for a selected piece of furniture from the IKEA website. You will see an example set of working drawings and a brief explanation of how this set of drawings was created. Please note that the example design employs different assembly techniques (e.g. – pins and glue assembly instead of using metal hardware).
It is your job to create a UNIQUE (this is NOT a group assignment) set of working drawings for your chosen piece of IKEA furniture. Click on the following links for a complete copy of the example set of assembly and parts drawings:
-
1. Assembly Instructions (Assembly Instructions from the IKEA)
-
5. Cart top
-
6. Drawer
-
8. Drawer front
-
9. Drawer side
-
10. Leg 1
-
11. Leg 1 wheel
-
12. Leg 2
-
13. Leg 2 wheel
-
14. Long shelf end
-
15. Long shelf end 2
-
16. Middle support
-
17. Mull
-
18. Shelf slat
-
19. Short shelf end
-
20. Side support
-
21. Wheel
You will be required to create a set of drawings like the example, but wait until your assembly is complete and include all assembly drawings as individual sheets within the top assembly drawing file. Part files can be displayed in their own separate drawings. Your assembly is required to have at least 10 different parts with accompanying drawings (similar parts count as one part…..e.g. pins, legs, shelves). Click on the movie link to see how the example drawings were created.
This is the take-home (CAD) portion of the FINAL EXAM.
After your training is complete in this tent, please proceed to the next tent to receive your BONUS assignment.