Lab: Perlin Noise
Making things look natural
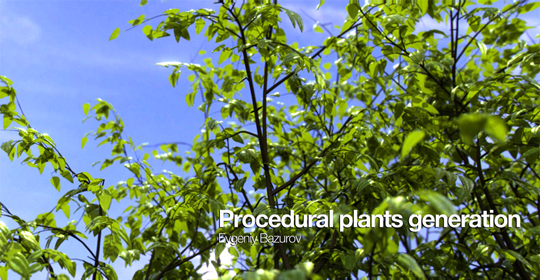
Noise is a pseudo-random function for generating values. Many phenomenon in the real world are noisy, meaning that there is some kind of random variation, such as static on a phone call. Clever people realized this and started using computational noise functions to add realism to computer graphics and other simulations of reality. One very simple approach, Perlin Noise (named after Ken Perlin), proved extremely effective and showed that simple noise can be very powerful.
Noise is ubiquitous in generating natural-looking materials such as clouds, wood and stone. It also is used for natural-looking distributions, such as where branches and leaves grow on a plant or the shape of lakes.

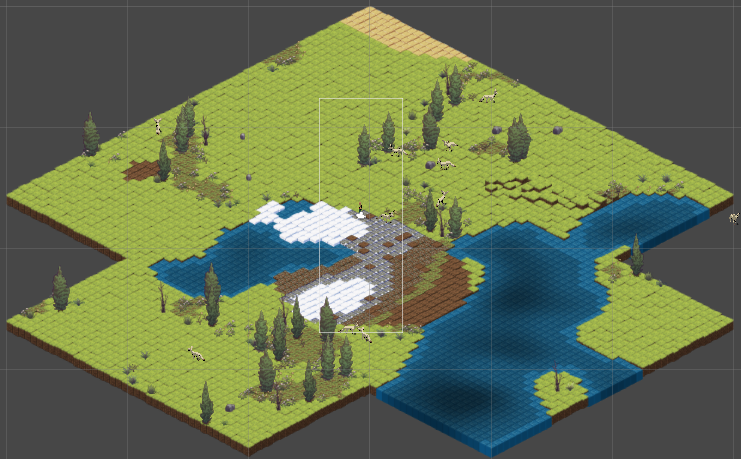
Recent games such as Mojang's Minecraft have brought procedural generation of maps into popular use. The image on the right is from a research game that several students have been working on with me, where we use noise functions to determine tile placement (including water) and plant distribution.

In this lab, you'll be playing with some noise functions, to get more experience with functions and image manipulation.
Some additional reading, if you're interested. You can Google much more.
Shae McCombs on Procedural Texture Generation
Notch, very briefly, on the original Minecraft terrain generation
First, you need to install the noise module, which has convenient functions for noise generation. Generating noise isn't hard, you just combine random numbers together in different ways. At a system command prompt like cmd in Windows (not the Python top level!), install the noise module.
py -3 -m pip install noise
To test it, try import noise at the Python top level.
A Canvas to Work On
Download the latest glib.py and save it in the directory you're going to be working in. Using the new functions available (and the examples from class), write a Python program with a main function that:
- Opens an 800 by 600 window
- Creates a 750 by 550 image (see glib.create_image)
- Uses glib.get_pixels and the setpixel method to set all the pixels in that image to RGB (150,200,200)
- Displays that image at position 400,300 in the window (right in the middle)
Bass! How low can you go?
To generate a noise value from the noise module, you do this:
from noise import pnoise2

value = pnoise2(0.5, 0.5, 1)
This is 2-dimensional Perlin Noise, where the first two arguments are real numbers reflecting the x and y coordinates of the noise. The noise returns a random number between -1.0 and 1.0 that smoothly changes with x and y. True random numbers would have no correlation to the numbers next to them. The third argument is the number of octaves, which alters the appearance of the noise.
The scale of x and y impacts how the noise comes out as well. If they range from 1-10, it will look very different than 1-100. To simplify this, we use the concept of frequency to scale x and y. That is, we'll pick a certain frequency and divide both x and y by that number. As we change frequency, we can see the noise change. Thus, the noise call will look like:
value = pnoise2(x/freq, y/freq, octaves)
We could have separate xfreq and yfreq variables for even more control, but won't do that here.
Not done yet! If we want to use those Perlin Noise values for RGB colors, then we need them to range from 0 to 255, not from -1.0 to 1.0. That's a straightforward scaling problem. (Hint: add and multiply).
Your job:
- Write a function that takes
x,y,freqandoctavesand returns a Perlin Noise value. - Write another function that takes numbers
bottomandtopand a value between -1.0 and 1.0, and returns that value scaled to be betweenbottomandtop. Remember, it's easier to test functions outside a big program. - Write another function that takes
width,height,freqandoctavesand creates a list-of-lists where the number of lists isheightand each list haswidthPerlin Noise values scaled to be between 0 and 255. (Hint: use the first two functions to do this). - In your main function, use that third function to create a list-of-lists of noise values the same size as the image you created (use frequency 16.0 and octaves 1). Then, set the pixels in the image to the values in the list-of-lists. That is, for each pixel, set it to the RGB color
(v,v,v)wherevis the value in the list-of-lists at the same coordinates. Note that the RGB values need to be ints, so you'll have to convert from floats in the list-of-lists. - You should be seeing a noise image! Alter the frequency and octaves to see the differences.
Keep working in the same file.
Okay, so noise looks kind of cool, but not like anything natural. Turns out that by combining noise functions we can get very natural effects.
Your job in this part is to write a function that takes two lists-of-lists generated by your third function and adds them together, producing a third list-of-lists. Since you want the resulting values to also range from 0 to 255, you'll need to divide each value by 2 as you add them.
Once you have that function, use it to add four different noises together, with frequencies 16.0, 32.0, 64.0 and 128.0. You will notice your program start to slow down as you generate more noises. If you want to be clever, you can do this in a loop. Now play around with frequncies and octaves and try to get something that starts to resemble an overhead view of clouds. Feel free to play with color as well by not just setting it to grayscale.