Scene, Camera and Model
Computer graphics in 3d simulate the way that light bounces off objects in a scene and enters our eyes so that we can see them. The scene is represented in 3d cartesian coordinates (x,y,z). In the scene, we place objects, light sources and a camera. Light bounces off the objects and projects onto the screen-shaped viewpoint of the camera, resulting in a 2d image, as shown below (pic from freedictionary.com).
This setup, used by Unity and everyone else, is called a scene graph, and provides a greatly abstracted interface to the rendering pipeline.
While in theory any sort of object representations could be used, real-time 3d graphics primarily use polygonal meshes. Up to tens of thousands of connected triangles make up a rough approximation of the shape we want. With this representation, only the vertices of the mesh have to be transformed and projected into 2d.

In Unity
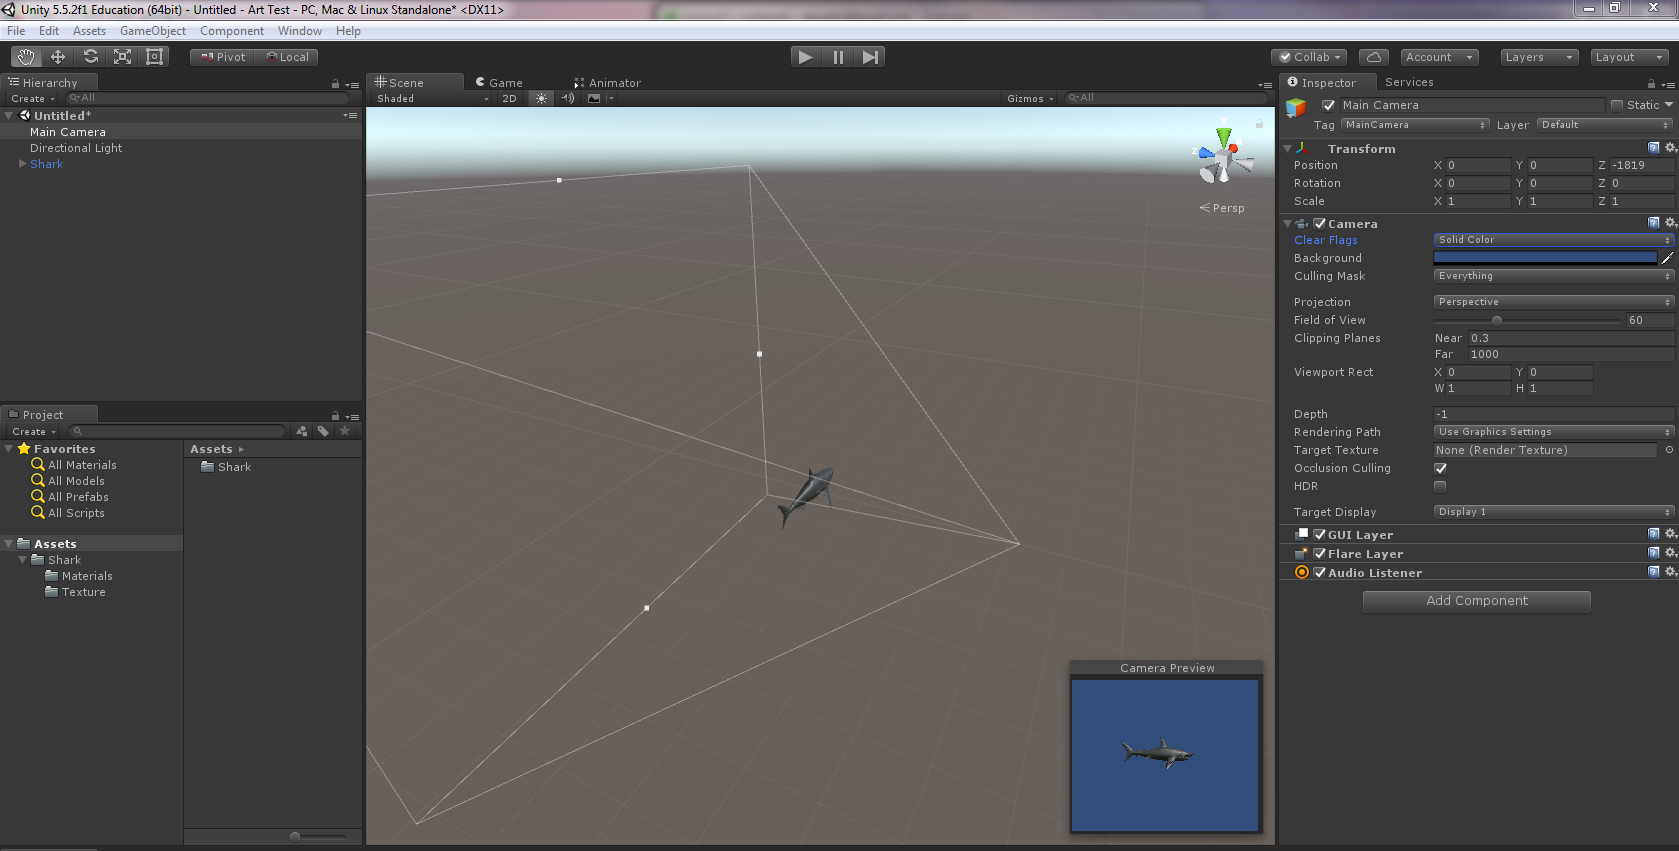
Run Unity and start a new 3d project. You don't need to include standard assets, which will just take up space. The Unity interface mimics what is common in 3d modeling programs such as Maya or 3D Studio Max. It starts you with a new scene with a camera and a light it in. the following panels are open by default:
- Hierarchy: tree view of all the objects in the scene
- Project: shows you the contents of the Assets folder
- Scene: 3d view into the scene, can move around using the mouse buttons
- Game (behind the Scene tab): shows you the scene from the PoV of the main camera
Download this 3d model: shark.zip. Go to where you created your Unity project and you'll see a folder called Assets. Unzip the model into that directory. Note the files inside:
.obj: contains the model geometry (obj is an old plain-text format that you can open and view or edit by hand. very inefficient, but simple and universally supported)..mtl: contains information on how to apply the textures to the modeltextures:.tgaimages that are mapped onto the model as described below.
Unity automatically imports most file formats. In the Project window, find the shark model and drag it into the scene. Manipulating things in 3d is pretty standardized, but takes some getting used to. The right and middle mouse buttons allow you to orbit and pan. Mousewheel scrolls. The floating tool in the upper-right corner of the Scene panel helps you snap to different axis and switch between perspective and orthographic projection, which is very useful. You can select entities in the scene and the tools in the upper left had corner allow you to move (translate), rotate and scale them. When an entity is selected, it's properties appear in the right-side inspector panel.
Click on the Main Camera to see the view frustrum. In the inspector panel, switch the Clear Flags setting from "Skybox" to "Solid Color". Then work on positioning the shark in front of the camera (within the frustrum so you can see it in the floating Camera Preview window.

Light it up!
Light is all around us, bouncing and scattering and absorbing off (and through) everything. Realistic light calculations are far to expensive for real-time 3d. Most real-time lighting follows from a ground-breaking Ph.D. thesis by Phong in 1973. Ambient light is directionless light everywhere equally. Diffuse light comes from a specific light source and spreads out in all directions based on the angle that it hits the surface at. Notice in the picture below how the diffuse light reveals the position of the light source and the 3d shape of the object. Specular light reflects directly towards the viewer, making an object appear shiny (smooth). The combination of the three approximates the way light reflects off of objects as seen below.

Unity, being very beginner friendly (as these things go), set up your new scene with ambient and directional light sources, and the shark model already has a material the specifies how those lights should reflect off it.
Ambient
From the Window menu, select the Lighting panel to open it up. Grab the Ambient Intensity slider and move it back and forth to see the impact of more and less ambient light.
Directional (diffuse, specular)
The directional light in the scene is a useful abstraction of a light source that hits at the same angle and intensity everywhere (think sunlight). This is much simpler and easier to tune than realistic in-world light sources, which we only want to use for cool effects like explosions and shadows. Click on the Game panel (behind the Scene panel) to switch to the camera view. Then click on the Directional Light in the Hierarchy panel and move its Intensity slider around to see how it reflects off the model. Drop it to 0 and try moving the Ambient Intensity slider again. Mess with both to see how the lighting model works.
Texture
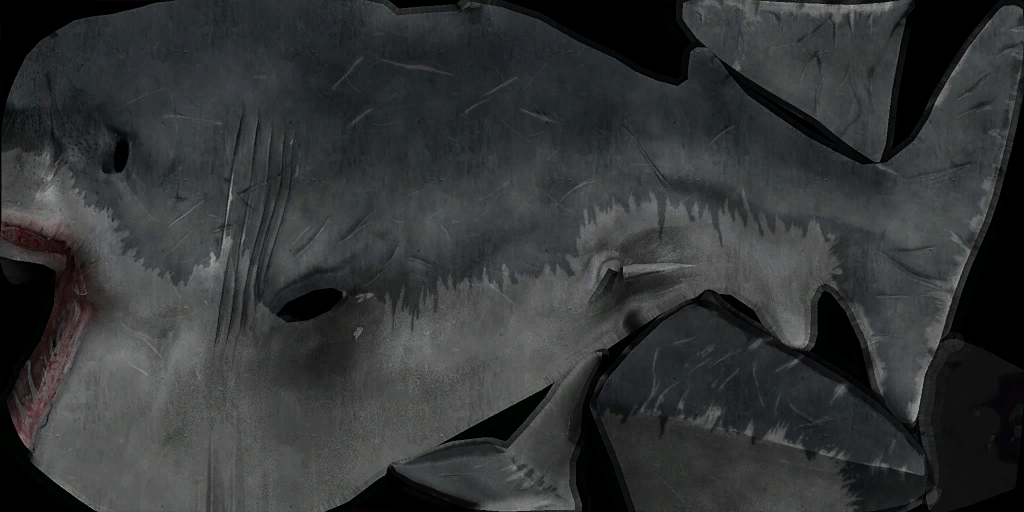
Unlike the weird blue thing up there, our shark has a texture applied to it. This is like a big sticker wrapped around the model, telling it what color the light reflections should be at each point. All those .tga files are the texture images, such as the one below. We'll talk more about that later.

Now You Will Dance For Me
To better see the impact of our light, we'll make the model spin.
Unity uses a Entity-Component architecture, which is a popular way to organize code in games. It is not a replacement for Object-Oriented, but it does emphasize composition over inheritance, eliminating a lot of deep class inheritance trees. There are many, many flavors of Entity-Component approaches, and Unity is simply one way to do it.
Each object in the hierarchy, such as the shark, is an entity. Entities exist only to group together components, which store all the data and do all the work. Click on the shark and you'll see in the inspector that it has a transform component that gives it position, rotation and scale. The concept of transform is the basis of real-time 3d graphics. Everything in the scene has a transform that applies to it and its children. Thus a ball can be parented to a character, and it will move with the character.
If you expand the shark entity in the hierarchy, you see that it has 3 child entities - one each for the body, eyes and teeth. If you translate the shark entity, the children all move with it. But select just the teeth and translate that, and you'll see how it has it's own transform, relative to its parent.
Select the first child entity again, and you'll see that it has more than just the transform component. The Mesh Renderer component stores the polygon mesh geometry to display that entity.
To add behavior to our game, we can add additional components (also called scripts) or our own. Click on the shark as a whole again and click the big Add Component button. Scroll down to New Script, give it a name, leave it in C#, and click Create and Add. There is now a new script component on this entity. Importantly, that script was also added to the Assets folder, and can be attached to any number of entities.
Scripterrific
Double click on the script in either place to open it in your code editor. It starts as a class that inherits from MonoBehaviour, the base class of all Unity components. The two most common methods to override are added by default.
Startis called once, when the entity holding the script is first activated in the sceneUpdateis called every frame by the main loop
Unlike in your mod1 games, you don't run the main loop. Unity does that behind the scenes and calls back all your scripts' Update methods.
Most scripts need to talk to other scripts to do their job. Here are some methods that get used all the time.
GetComponent<type>()/GetComponents<type>(): callable from any script to get component(s) of the templated type on the same entityGameObject.Find(string name): static method to look for a named entity in the scenetransform: cached link to the transform component on the same entity, which all entities havetransform.parent: the parent transform for this entitytransform.GetComponentInChildren<type>()/transform.GetComponentsInChildren<type>(): get component(s) from all the child entities under this onetransform.Find(string name): look for a named entity under this entity
All of them (except transform) are relatively expensive! If you need access to a component in Update, cache it in Start.
You Spin Me Right Round Baby Right Round
Put this code in your script, then go back to Unity and click the big play arrow at the top.
  public float ROT_SPEED = 5.0f;

  void Update () {
        transform.Rotate(new Vector3(0, ROT_SPEED * Time.deltaTime, 0));
  }
Kinda slow. But wait! While it's still running, click on the shack in the hierarchy and look at your script in the inspector. the public variable ROT_SPEED has been exposed there and you can edit it in real-time to tune the proper rotation speed! Note that doing so doesn't actually change the code, but can be very useful for tuning.
Notes on the code
- C# is very much like Java; if you know one, you're competent in the other
- All public variables of primitive or MonoBehaviour type are exposed in the inspector. You can customize the editor in many ways, but that's a whole differnt thing.
Time.deltaTimegives you the amount of time the last frame took, so you can use that everywhere.- Vector3 is the foundation of spatial manipulation, just like our vector in 2d. It has arithmetic and dot product and magnitude and all that. Unlike Java, where everything is a reference, C#
structsare value variables, which includes Unity's Vector3. This means you cannot set a Vector3 to NULL, and they get copied every time they are passed. This makes the code much safer. Attempting to edit the transform vectors won't work because you're altering a copy. You have to create a new one rather than doing:transform.rotation.y += 5.0f;
- Graphics hardware is tuned to work with
floatrather thandoublevariables. For type compliance, you have to putfafter real number literals.