Arena
- 4.1.1 Create player entity with animator and animation controller
- 4.1.2 Add animation parameters and create run and idle blend trees
- 4.1.3 Connect WASD movement to animation

Sprite sheets and animation clips are already set up for you in Assets/ArtAssets/player.
Creating the Player Entity
- Create
Playerentity and add thePlayerscript - Add a SpriteRenderer and set a frame from the idle spritesheet
- Add an Animator and create a new AnimationController called
Playerfor it
Setting Up the Animation Controller
- Double-click the AnimationController to edit it
- Drag the
run_rightclip into the animator pane and set it as the default state
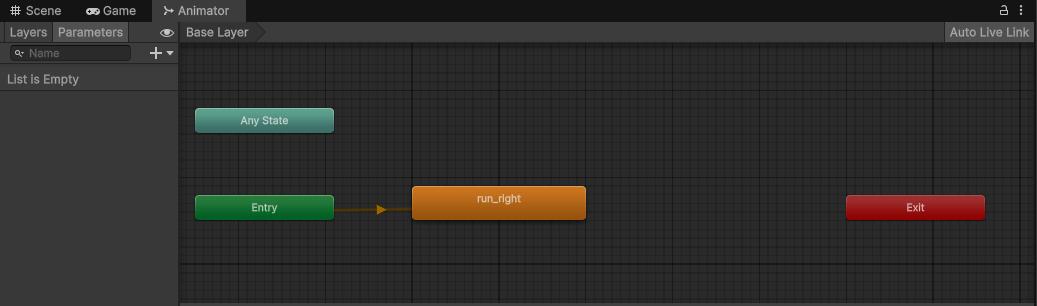
Test - you should see the player character running in place with the animation you added.
Animation Parameters and Blend Trees
In the animator pane
- Add two float parameters
DirectionXandDirectionYand a boolean parameterIsMoving - Right-click and create a new state from new blend tree, name it Idle

Open the Idle state and click on the blend tree inside. Edit it in the inspector:
- Set the type to
2D Freeform Directional - Set the parameters to
DirectionXandDirectionY - Add the four idle animation clips in the four cardinal positions (e.g. (1,0))
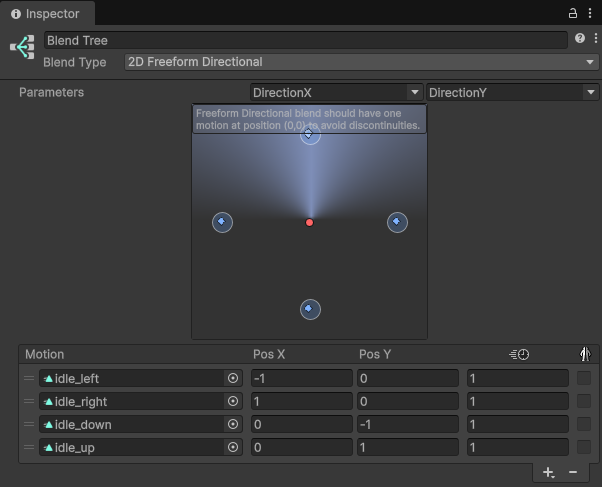
Do the same to create a Run state with the four run animation clips.
Connect the transitions in the animator pane
- Make the
Idlestate the default - Delete the placeholder
run_rightstate - Right click on the states to make transitions between
IdleandRun
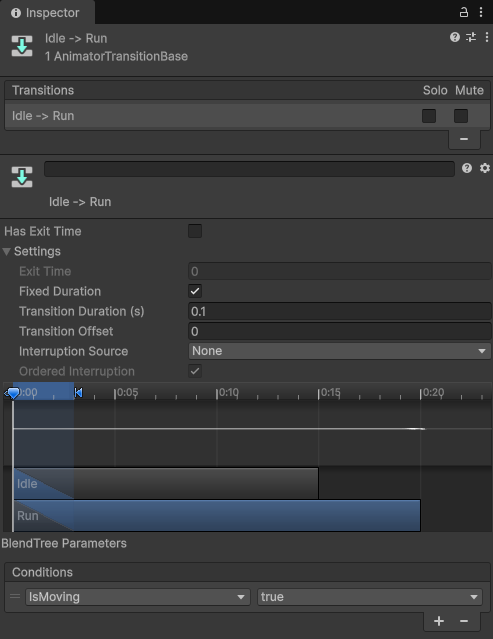
Click on the transition arrows to edit their properties in the inspector:
- Uncheck
Has Exit Time - Set
Transition Duration (s)to 0.1 - Add a condition at the bottom of each: Idle -> Run when IsMoving is true, Run -> Idle when IsMoving is false
Movement Script Integration
- Get a reference to the animator component
- Use the animator methods
SetFloat("varname", value)andSetBool("varname", value)to update the animator based on movement
Test - the player character should now run in the correct direction.
- 4.2.1 Create slash attack entity and animation
- 4.2.2 Trigger slash attack on left click
- 4.2.3 Update character facing and pivot action to follow the mouse
Implement a melee attack system where the character can perform slash attacks that follow the mouse cursor direction.
Creating the Slash Attack Entity
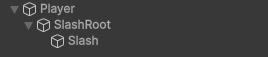
- Create
SlashRootandSlashunderPlayer - Add an Animator and Animation Controller called
Slashto theSlashRoot - Add a SpriteRenderer to
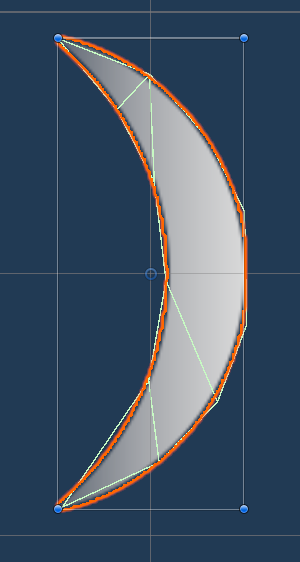
Slashand use the slash image inArtAssets - Create a new Animation Clip called
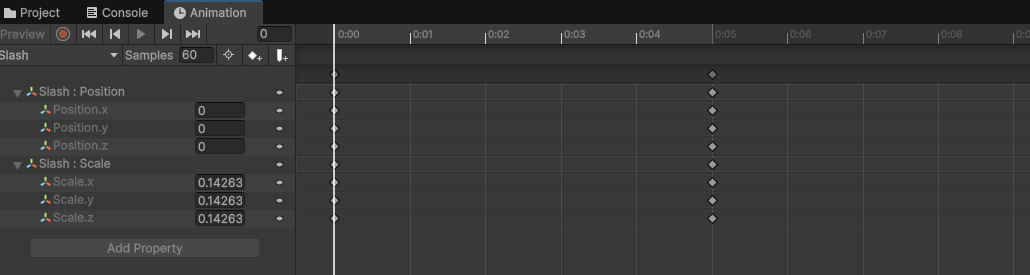
Slashand double-click to open the animation pane
- Drag
SlashRootinto the animation pane to target it and add the position and scale properties - Use record mode to animate those properties, starting small at position 0 at time 0:00 and moving right and getting big at time 0:05
Slash animation controller and test it.Attack Trigger
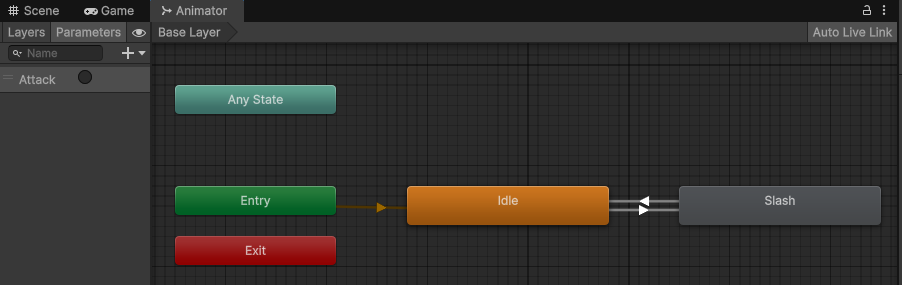
- Update the animation controller with an empty default
Idlestate and transitions to the slash - Add a trigger parameter
Attackthat triggers the transition Idle -> Slash with transition duration 0 - The transition Slash -> Idle
Has Exit Time(play the whole clip) and transition duration 0.1
- In the
Playerscript, get a reference to the slash animator (use Transform.Find to get children by name) - Use
SetTrigger("varname", value)on the slash animator when the user clicks
Cleaning up
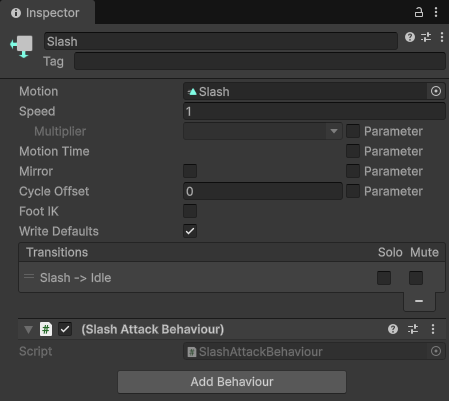
- Open the
Slashstate in the animation controller and add a behavior, the providedSlashAttackBehaviorscript - In the callback in that script, call a function on
Playerto let it know the attack has finished - Deactivate and activate the
SlashRootso that it only appears during the attack action
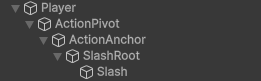
Mouse Following and Character Facing
Update the player hierarchy like this, where the ActionPivot is at the character chest and the ActionAnchor starts out to the right:
In your player script Update, get a vector pointing towards the mouse and use it to rotate the action pivot. To calculate the angle corresponding to a vector and rotate a transform by that amount, use these formulas:
float angle = Mathf.Atan2(mouseDirection.y, mouseDirection.x) * Mathf.Rad2Deg;
actionPivot.rotation = Quaternion.AngleAxis(angle, Vector3.forward);
Update your code so that the animator direction (character facing) follows the mouse rather than WASD.
Test the system to ensure the character faces the mouse cursor and the slash attack appears in the correct direction when left-clicking.
- 4.3.1 Create target dummy with health and TakeDamage
- 4.3.2 Take damage from player attacks
- 4.3.3 Add visual feedback on hit (simple color flash)
Build a target dummy that responds to player attacks with a health system and visual feedback when taking damage.
- Use a simple circle for the dummy and add a Target script.
- The target script should have max health, current health, and a public method to TakeDamage
- Put a rigidbody 2D on the SlashRoot to receive collisions. Set Gravity Scale to 0.
- Put a polygon collider 2D on the Slash sprite and mark it Is Trigger. Due to transparency it may not cover the whole crescent in which case use the collider editor to add and move points in the green mesh.
- Put a circle collider 2D on the dummy and mark it Is Trigger
- Add the provided SlashDamage script to the SlashRoot. In the OnTriggerEnter2D, see if the other collider has a Target component. If so, call TakeDamage and pass the slash damage value.
- Use the hitTargets set to make sure you don't hit the same Target twice in the same slash.
Visual Feedback with Color Flash
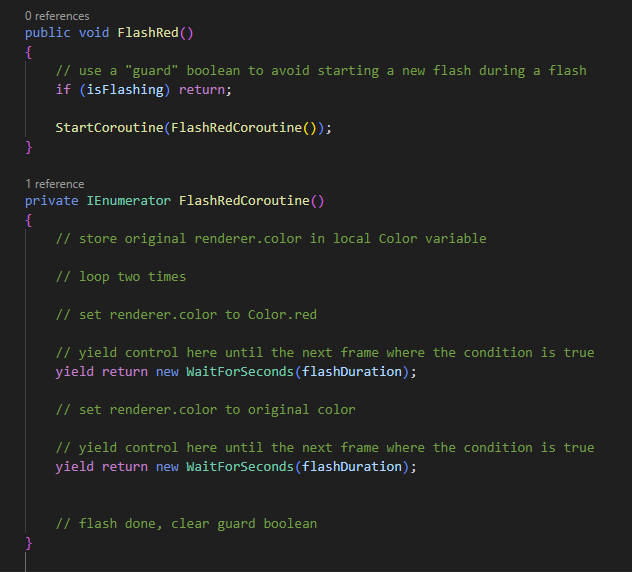
Create the FlashRed method below and call it from TakeDamage. This is using a C# coroutine which is a form of single-threaded asynchronous code (like async/await
in JavaScript and yield in Python). The coroutine runs until it hits a yield statement, then releases control and waits there until the processing thread is
available. Every time the thread comes back, it checks the provided condition (in this case that a certain time has passed) and if so it continues execution.
This has the effect of running the coroutine over some number of frames:
- First frame: goes into the loop, turns the sprite color red, then yields
- Another frame
flashDurationseconds later: turns it back to the original color, then yields - Another frame
flashDurationseconds later: goes back to the top of the loop, turns the sprite color red, then yields - Another frame
flashDurationseconds later: turns it back to the original color, then yields - Another frame
flashDurationseconds later: goes back to the top of the loop, exits, and finishes
Test the system by attacking the dummy and observing both the health reduction and the color flash effect.
- 4.4.1 Add health bar to target
- 4.4.2 Update health bar (scale) based on percent health remaining
Create a visual health bar system for the target dummy that dynamically updates to show the remaining health as a percentage.
- Open square.png in the inspector and use the sprite editor to move the pivot to the far left
- Create the HealthBar separate from the player by dragging health-frame.png into the scene and renaming it
- Drag the square in also, parent it to the frame, and scale it to fit (and change its color)
- Use the order in layer on the SpriteRenderer so that the frame is drawn over the bar
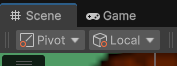
- In the upper left corner of the Unity editor, switch the
Centerbutton toPivot
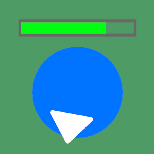
- Use the scale tool to scale the bar horizontally and confirm that it fills and empties the health bar as shown above
- Add a HealthBar script to the HealthBar frame with a public method to SetPctHealth
- In that method, set the fill scale.x to display the appropriate percent health (note since the fill was scaled to fit, its not from 1.0 - 0.0)
Attach the HealthBar to the player and call SetPctHealth from the Target script on TakeDamage. Test your code to see that when you hit the dummy the health bar updates.
- 4.5.1 Create a tilemap and tile palette
- 4.5.2 "Paint" the background using the tiles
Fix this place up. The generic blue background is so out of style.
Creating Tilemap and Tile Palette
In the Hierarchy, right-click and select 2D Object > Tilemap > Rectangular to create a new Tilemap GameObject. This automatically creates both a Tilemap and TilemapRenderer component on a GameObject called "Grid".
Select the Tilemap and click the New Palette button that appears on the lower right corner. (Or Window > 2D > Tile Palette). In the Tile Palette window, click "Create New Palette" and save it in ArtAssets. Drag the sprites from mystic woods / palette into the new palette.
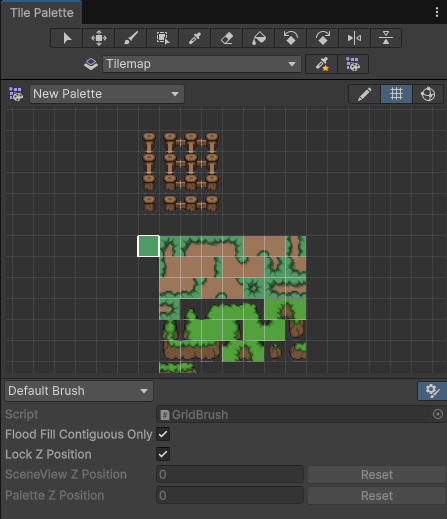
Painting the Background with Tiles
Select the Tilemap GameObject in the Hierarchy. In the Tile Palette window, select the Brush tool and choose tiles from your palette. Click and drag in the Scene view to "paint" tiles onto the tilemap, creating your arena background.
Use different tiles to create variety in your background - floor tiles, wall tiles, decorative elements, etc. You can use the Rectangle tool in the Tile Palette for quickly filling large areas, and the individual brush for detailed work.
Test your tilemap by playing the scene and ensuring the background appears correctly. Adjust the Tilemap's sorting layer if needed to ensure it renders behind your player and other game objects.
- 4.6.1 Setup fireball pool
- 4.6.2 Shoot fireball on right click w/ spellcast animation
- 4.6.3 Damage target dummy on hit
Implement a fireball magic system that allows the player to cast fireballs by right-clicking, complete with spellcasting animation and projectile mechanics.
Setup Fireball Pool
- The Fireball prefab and FirePool script are provided in the downloadable assets on the home page
- Create an empty FirePool and add the script, set the Fireball prefab
- You probably have to re-add the Fireball script to the Fireball prefab (they tend to get unlinked)
- Read the complete FirePool script to see how it instantiates a pool of Fireballs that you can get as needed
Shoot! Shoooooot!
- Add a spellcast animation blend tree to your Player Animator Controller, same as Idle and Run
- Transition from the Any State node to Spellcast with a new trigger parameter Spellcast (transition duration 0)
- Transition from Spellcast to Idle with Has Exit Time (transition duration 0.1)
- Add a right click callback to your Player script (
controls.UI.RightClick.performed) - In that callback, (1) store the shot direction, (2) set a bool to indicate casting, (3) trigger the animation
- Just like with the slash, add a script SpellcastBehavior to the Spellcast node in the Animator Controller
- In the callback, call a function on Player to let it know the spellcast has finished
- In that function, get a Fireball from the pool, position it at the ActionAnchor, and Launch it in the stored direction
- Finish the Fireball script to make it move, apply damage on collison (like the slash), and eventually timeout
- While the Spellcast is going on (use the boolean), prevent the Player from moving (animation lock)
Test the complete fireball system by right-clicking to cast fireballs at the target dummy and verify that damage is applied correctly.
Add the additional 4.6 checklist items to your git commit message!
- 4.7 Fireball applies a burn effect instead of direct damage
Have the fireball apply a burn that does a small amount of damage every second for 3 seconds. Implement the burn status in the Target script and trigger it instead of TakeDamage. You could also display a small fire icon over the target dummy while it is burning.
Add the additional 4.7 checklist item to your git commit message!