Setup Tools
- 1.1 Download and install the unity hub and editor 6000.1
For this class we are using Unity, the industry leading game engine for mobile and indie titles. It is free to use for educational purposes.
For the entire class, we will be using only Unity version 6000.1.X. Use this version for all class activities and assignments.
You can safely install newer patch versions as they come out (e.g. 6000.1.9f1 -> 6000.1.10f1), but do not update to a new
minor version (e.g. 6000.1.9f1 -> 6000.2.0f1).
- Download the Unity Hub here. (already installed on lab machines)
- Create or login to the Hub with a Unity account. You can accept the personal license.
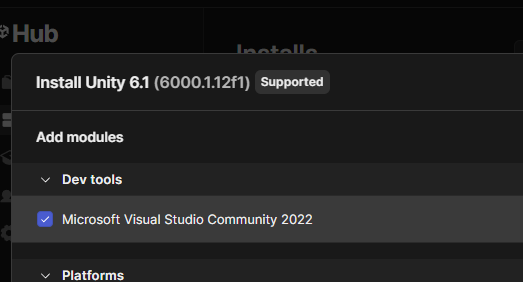
- In Unity Hub, install the latest
6000.1.Xversion of the editor. In the "Add modules > Dev tools" section uncheck Visual Studio Community. (already installed on lab machines)

You can have multiple editors installed to use for other projects.
- 1.2 Download and install VS Code
You can use any editor you like, but VS Code is the supported choice (by Unity and for this class).
- 1.3.1 Install the git CLI
- 1.3.2 Create a github account
- 1.3.3 Configure local git email, username, and editor
- 1.3.4 Accept the assignment and clone the repo
- 1.3.5 Set the commit template for the repo
We will be using git source control for all assignments and projects. All examples will be done using the command-line interface (CLI).
You can also use a GUI if you like, but you need to be able to use the CLI first.
- Installation Guide
- Create an account on GitHub. (do not need to use university email)
- Generate a and save it somewhere safe. Do a "classic" token with "repo" scope.
Local configuration
Create a directory for your class work. On a personal machine, I recommend a short path with no spaces like c:\work\3370 or ~/work/3370.
I would not put code in a OneDrive or similar cloud-sync'd directory, that's what git is for. On shared lab machines you need to work in your user directory (e.g.
c:\users\yourname\3370).
Open your terminal of choice and navigate to your class work directory.
Configure the name and email for git to use when you commit code changes.
$ git config --global user.name "John Doe"
$ git config --global user.email johndoe@example.com
Configure the editor to use for git commit messages. If in doubt, use whatever you use for your code editor, such as VSCode ("code"). You could also use "nano", "vim", or any other text editor you like that you can execute from your terminal.
$ git config --global core.editor "code --wait"
GitHub repositories and login
Each assignment in this class will have a github invitation URL for you to accept.
They are in this format: https://classroom.github.com/a/4aiYdw3S
The first time you accept an assignment, you need to click on your email from a list to let me know which github account is yours.
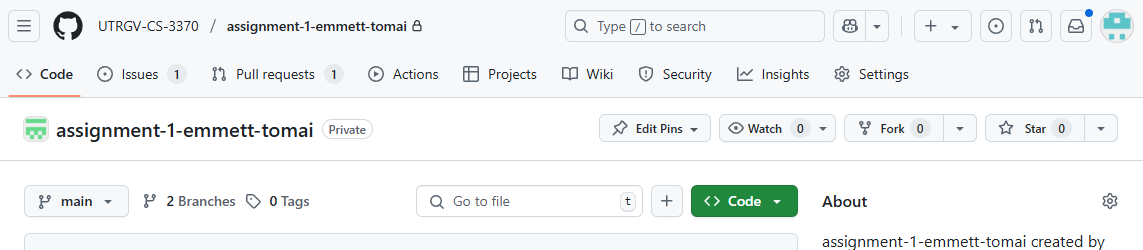
Accepting an assignment invitation creates a new repository for you to work in. It will often contain starter code for the assignment. Once it gives you the new repo URL, click on it and you should come to a page that looks like this:
Click the green "Code" button and copy the HTTPS URL. Go back to your terminal and run:
$ git clone <repo URL>
If you haven't used github before, you will need to login. On Windows, this will open a popup window asking you to enter your github username and password. On Mac and Linux, the it will prompt you to enter your username and password there at the terminal. This is not your github password! Instead, you need to follow these instructions to create a Personal Access Token that serves as your password. Create a "classic" token with "repo" scope. Save the PAT somewhere until you finish this assignment to make sure everything works.
Once you have cloned the repo, in your terminal cd into the repo directory and configure it to use our special class commit template. Unfortunately, you will need to run this command in each new class repository that you clone:
$ git config commit.template .gitmessage
If you are only using git for this class, you could run it once instead with the global flag to impact all your repos:
$ git config --global commit.template .gitmessage
This will cause any repos that don't have a .gitmessage file to error on commit. Undo it globally with:
$ git config --global commit.template ""
- 1.4.1 Create a new Unity project
- 1.4.2 Configure Unity external script editor
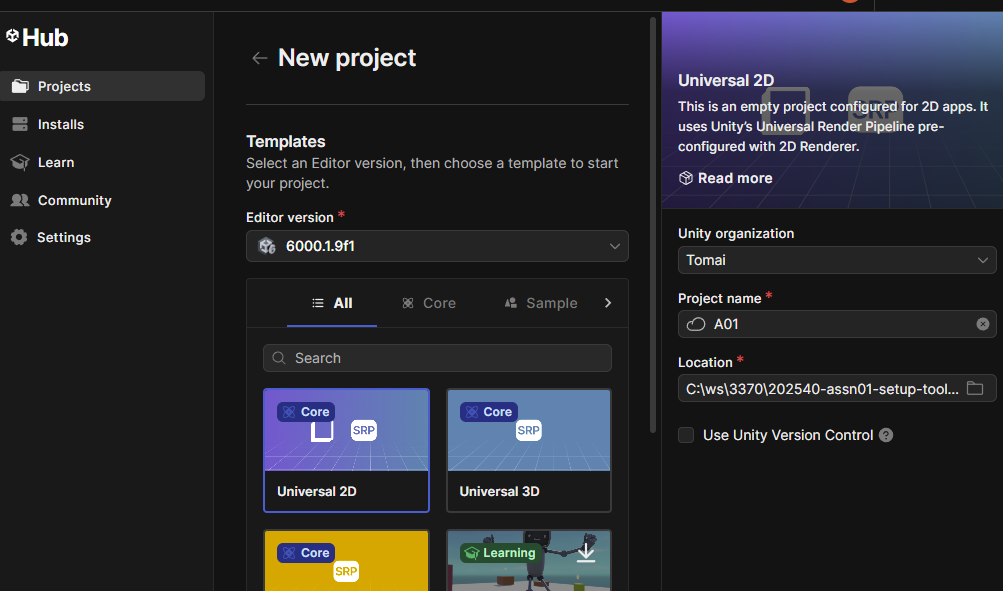
In Unity Hub, create a new Unity project.
- Select Universal 2D project
- Set the Location to the assignment repo that you cloned earlier.
- The Project name can be whatever you want.

Unity will take some time to create the project, as it generates a lot of temporary files for runtime efficiency.
Unity configuration
Once the Unity editor opens, go to the Edit -> Preferences... menu and select the External Tools tab.
Make sure that VSCode is selected as the external editor.
- 1.5 Commit and push your work
As you finish parts of an assignment, commit your changes and push them to github, just like you would with any project.
Our custom commit template will come up on commit so you can record what parts of the assignment that commit finished. Simply uncomment (delete the #) the lines that were addressed in that commit.
This is a more real-world approach to grading, as I shouldn't have to tell you what you did and didn't do. You should already know! My job, like your future project leader, is to evaluate whether you actually did what you said you did correctly.
Quick reference:
      git status                          // to see what has changed (do this before and after all the other commands!)
      git add .                           // to stage all changes you've made (always in the repository root!)
      git commit                          // to store your staged changes as a changeset
      // the commit message editor opens here with the commit template
      git push                            // to upload all your changesets to GitHub
For simple individual use, you will pretty much always do add then commit then push at the same time.
Q: Can I make incomplete commits that don't claim to have finished anything?
A: Yes! Saving partial work is fine. They will get rolled into the review when you do claim to have finished something. If you don't ever claim to have finished anything, that will be very easy to grade.
Q: When I push it asks me for my credentials again.
A: If you aren't configured to cache your credentials on mac, run this command: git config --global credential.helper osxkeychain.
The next time you do an action and enter your credentials on this machine, they will be saved.